This is a little tuto to help you tighting up the tendons with the « SimpleServoBed ». In these pictures there is also a demonstration of how to line up the wiring for to add sensors on the tip of fingers.
Using a multi colored nappe will help you to distinguish wich sensor is connected to your Analog pins.
Seperate the wires by pairs. One pair per finger. You can see here in the wrist I’ve decided to have the wire nappe on the bottom of the wrist and the tendons (red braided fishing line) on the top. Make sure at all time not to twist/tangle tendons and wires somewhere during the lining to tip of fingers, other wise the fingers will never work correctly.
Now that the tendons and wires are lined up correctly from servo to finger tip, make three or four knots by the finger tip. Put a drop cyanocrylate glue on the knots to secure them.
Drill two holes through the horn wheel.
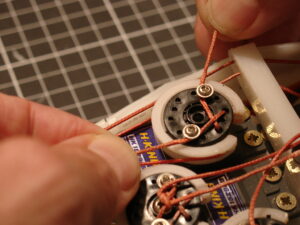
Run the tendon braided line coming from the finger through the outside hole to the inside. (This above picture is from a previous tuto, the black horn wheel is not correctly centered on the printed pulley, and screws are different)
Now run the tendon line into the hole you have drilled.
You should now have something like this.
Do the same for the second tendon, you should now have something like this.

Set back the actuator wheel on the servo respecting the intial degree position and pull on the lining as much as you can. (without breaking something of course)
Tight the first screw maintaining the tendon pulled.
Do the same with the second screw.
Finish with two knots between the two linings. This is a safety to avoid the lining to get loose.
This set up makes it easy to re-tight or adjust the lining if you need to.
You should now have something like this.( Sorry blurry picture)
Try to move the servo using the Arduino code . Check if the tension and the position of the finger is still correct. If ever it is too loose, re-adjust the tendons.
Do the same for all the fingers.