Assembly of the head.
Important notice: I have created a new head model called i2Head. It is much more complex and requires casting silicon, here is the link: https://inmoov.fr/i2head/
This original model is fairly simple, so I won’t extend myself on this part.
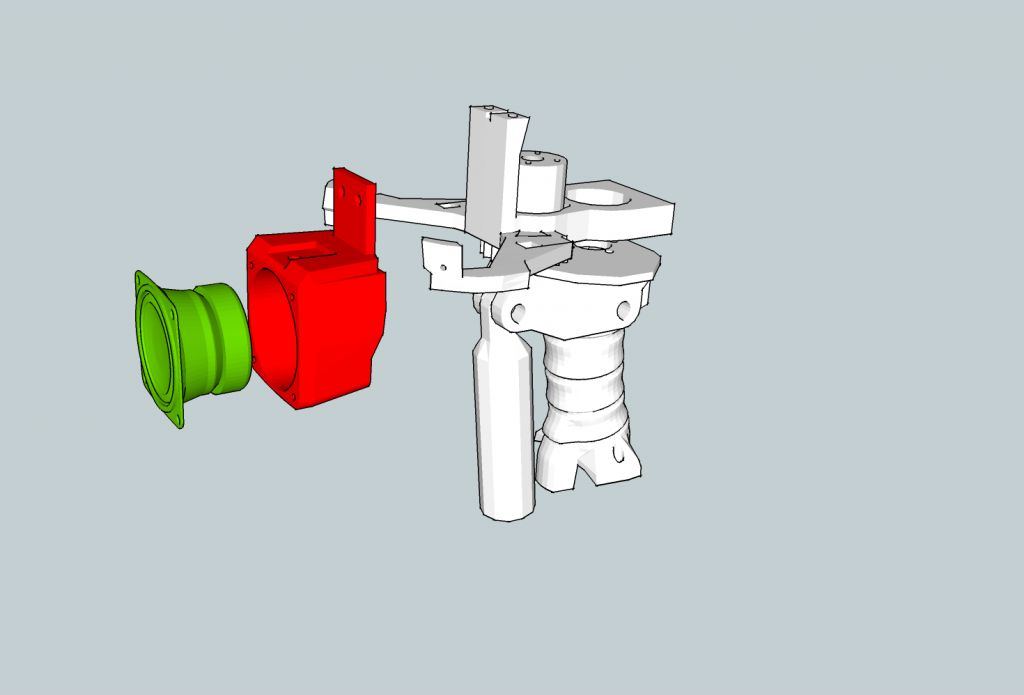
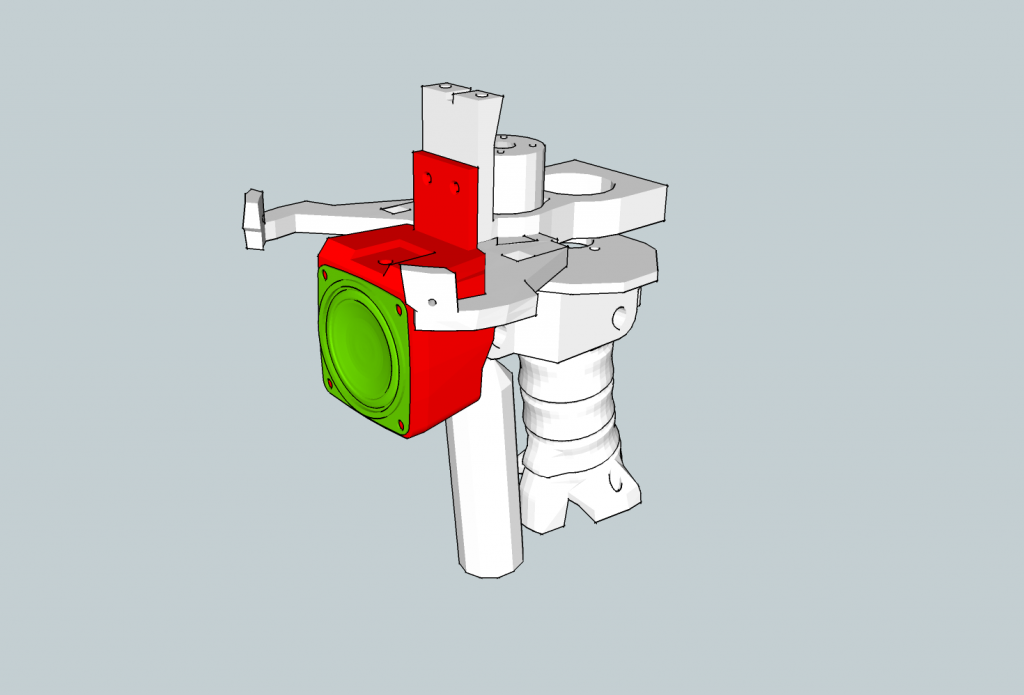
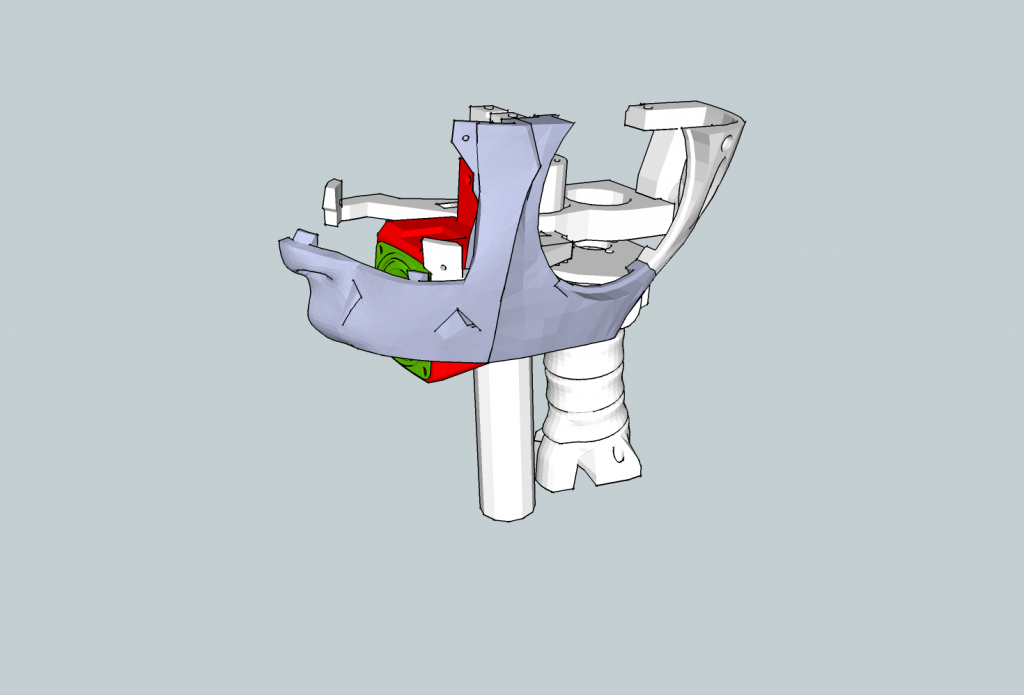
Be sure to assemble the mechanisms that are inside the head before putting the outside shell together.
Download STL from the Gallery
Before printing all the parts you should print the CALIBRATOR, to check if your parts will fit together. If you have a very hard time putting those parts together, adjusting the horizontal expansion setting of your slicer software can solve that, this setting can vary depending of your slicer and printer but users report to set it at -0.15 is a great place to start.
An infill of 30%, wall thickness 2.5mm, best with no raft, no support(unless specified), use a brim on big parts to avoid warping.
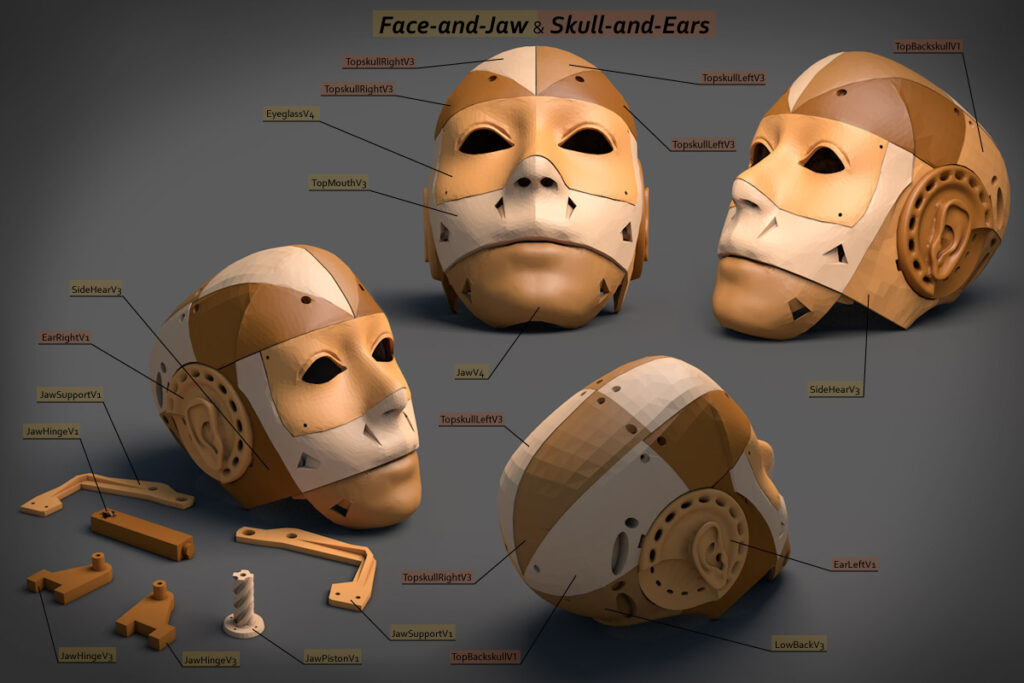
- Skull and ears
- Face and Jaw


Thanks to Bigfilsing for this video tuto.
Thanks to Shido for this video tuto.
Dear community,
just started my InMoov Project and decided to go for the head & neck first. Do you have any advise where to use the 2 different types of bolts (threaded bolt & wood screws) …. E.g Use threaded bolts to fix all 3D printed parts?
Any Feedback is very mucg appreciated.
Sven
Hello,
Mainly threaded bolts for 3D printed parts. Wood screws for servo fixing. If you follow the tutorial pictures, it should help you determine what I used.
Sorry if I am missing this somewhere obvious, but is there an Arduino sketch I can use easily to set up and then test the servos in only the head construction?
Hello,
Why don’t you use the same sketch than the basic Finger Starter?
Just adapt it to your needs.
http://inmoov.fr/finger-starter-arduino-script/
Other wise you can start MyRobotLab and use this minimal script for the head, which is bundled in the InMoov directory:
https://github.com/MyRobotLab/pyrobotlab/blob/develop/service/InMoovHead.py
Thank you! I will look at both options.
I do not know what screws I have to use ?
Basic screws references are in the Hardware and BOM page, but it’s up to you to define what you want to use. Since the project is used also by non metric builders, I didn’t specify each screws for each purpose.
I do not know what screws I have to use ?
plese
Hello Gael,
I was about to finish the head and everything works fine, except the recommended servo HK12598 for the yaw.
First it did not rotate at all. After changing the MRL min/max values to something like 40/140, the servo at least rotates, but only approx 90 degrees rather than 180.
Do you have any idea how to make the HK12598 work, or can you recommend a different servo?
Regards,
Sven
Hello,
The 90 degree rotation of the HK15298 is largely enough to operate the jaw, no need to look for another one.
Each servo needs to be calibrated with their min and max values in the skeleton config files. This is very necessary otherwise you will eventually burn some servo.
To calibrate a servo you can use the tool which is located in the directory C:mrl/myrobotlab.1.0.2693/tools. This will launch a Arduino service and a Servo service. You can use it to determine the minimal and maximal course of your servo in order to set the correct values in the skeleton config files.
I cant find anywhere that says the specs for printing the parts. Specs as in 35 infill and 3 shells or what? Quality and so forth!
Any help on this would be appreciated.
Indeed, I do not put the required specs because it varies too much depending on your software and printer.
In general I print most parts with a perimeter of 2.5/3mm, infill 30% with a resolution of 0.3mm for regular parts.
For gears and parts that cary heavy load, like the shoulders for example, use a perimeter of 3.5/4mm, infill 30% with a resolution of 0.3mm. If your perimeter is strong, no need to add excessive infill which adds unnecessary weight.
Awesome! Thank you very much Sir! I just want to get this first model done as correct as possible. I am only doing a shell of the Inmoov so I can present it at the school board meeting. I want to introduce the Inmoov to our robotics club at the Middle and High schools here in Georgia. Our guys still build battle bots out of toasters and such and I want to give them something more.
I’m no teacher just an active parent.
any news on school board approval?
Also anything you tell me that has to do with the InMoov, that’s what I do unless my printer cant handle it but The Anet A8 has been a beast after all the upgrades.
Hi!! I’m starting with my InMoov project and I decided to start with the head and neck. Do you know what type of screws I need to put and how many of them? I need to know also the material of the screw theread, is it plastic or wood?
Thanks!!
I have the same problem, sombody know’s it??
Hello, you can check the Hardware and BOM page, but there is no precise definition for each body parts.
Hello I have started printing the head parts. Are there any files that have individual skull parts. I am finding that printing the skull parts in the top right file, three parts they interfere with the nozzles.
Thanks
Hello,
You can separate them using this simple tutorial I made a few years ago:
https://groups.google.com/forum/#!msg/inmoov/n4tOkMjNBCM/jhKtrImb6xYJ;context-place=forum/inmoov
Thank you, All Done.
Hi, I printed all the parts of the neck, but in the instructions I know that some pieces are different, and come from the “old neck” section. Are there any instructions for the new parts?
Hello,
There is a thread on that subject on the English Forum with some pictures which will help untill I make the proper tutorial.
https://groups.google.com/forum/#!topic/inmoov/NPedcaiYIc4
Hi Gael, I have a question about the loudspeaker support: at what height it should be screwed?. Thanks in advance.
Hello,
Yes I should add the holes for to know the position, it would be eaiser.
Here an image to show better the heights.
http://inmoov.fr/wp-content/uploads/2019/01/SpeakerLevel2.png
Thank you. Effectively, the speaker support stops there.
Bonjour Gael,
Depuis hier, il m’est impossible de répondre sur le forum francophone / FABRICATION / PIECES IMPRIMEES (au sujet de Head) : j’ai toujours le message :
ERROR: Your reply cannot be created at this time.
J’ai fait plusieurs tentatives hier et aujourd’hui, sans succès.
Merci.
Bonjour, essayez-vous de joindre un fichier (photo) qui serait trop lourd pour passer le message?
Non, je n’ai joint aucun fichier. J’ai essayé aujourd’hui de répondre à un autre correspondant : même chose.
Merci pour votre réponse.
Bonjour,
Votre adresse avait été rapportée en tant que possible spammer(c’est un systeme automatique), je pense que ça devrait aller maintenant.
Non, désolé Gaël, ça ne marche toujours pas.
Je viens de réessayer sans succès.
Christian
Pourtant, je vois que vous pouvez poster des messages en réponse à Bruno.
Apparemment vous êtes contraint par le nombre de mots?
Hello Gael again, I do not see in any tutorial where the amplifier for the speakers of the ears is placed. Sorry for my English because it is translated with google traslate. Thank you.
No that is true, I didn’t do a tutorial because, I changed of place a few times during my built research.
In the head is a pretty good space.
Oui, je ne dois pas dépasser quelques mots, sinon cela bloque avec le message :
ERROR: Your reply cannot be created at this time.
Merci pour votre réponse.
Hey, Gael. I want to appreciate you about the above video. it is incredibly good. Thanks.
Thanks!
Good evening, I’m having a hard time buying the servo that goes in the joints of the jaw and neck, someone can point me a place to buy, I have ease in buying on the websites of aliexpress and banngood. Thank you if anyone can help.
Hello,
You can try the PDI-6221MG-180. They are reported to fit.
Thank you Gael, sorry for the delay in responding, I was traveling due to carnival in Brazil, yes this one I found, thank you very much.
I found this easy on aliexpress. I’m already ordering.
Olá conseguiu comprar o PDI-6221MG-180, funcionou? Abraço
Hello,
Yes it works fine.
Amigo, e sobre aquele servo maior do centro da cabeça voce usou qual modelo? Um ótimo dia.
In my tutorial I use a HS805BB. But you can use other servos like the PDI-HV2060MG
what is the exact infill % and layer height for printing inmoov humanoid?
Hello, In general 30% infill is okay but depending of your perimeter settings. In average I set my perimeter to 2,5mm, this allows the part to be almost hollow but with strong perimeter walls.
i basically wanted to print head along with neck. kindly provide me with some link or tutorial to let me know the parts to be printed and fix them.
If you want to print the head alone, you will need to print all parts in this link:
http://inmoov.fr/inmoov-stl-parts-viewer/?bodyparts=Skull-and-Ears (note there is different ear options, select the proper file to print according to your choice)
http://inmoov.fr/inmoov-stl-parts-viewer/?bodyparts=Face-and-Jaw
http://inmoov.fr/inmoov-stl-parts-viewer/?bodyparts=Eyes-mechanism (note there is two types of camera, select the proper file to print according to your camera choice)
You might want to also print the Neck in order to fix the head on something:
http://inmoov.fr/inmoov-stl-parts-viewer/?bodyparts=Neck
Hi
could you plz tell us the steps for connection speaker & amplifier with InMoov
Thx
Hello,
You can find the connection wiring diagram on the page Harware and Bom page.
http://inmoov.fr/wp-content/uploads/2018/12/InMoov_TDA2030-600×720.jpg
Hi
How are you? I’m very interested in your inmoov. I’m from Bangladesh. I print face and jaw also eye mechanism. But I can’t find the head upper side option! can you tell me plz where i can find those part plz?
Thank you
Shahed
Hello,
You can find all the STL files in the Gallery/Library
http://inmoov.fr/inmoov-stl-parts-viewer/?bodyparts=Skull-and-Ears
oh Thank you so much . I’ll make it
do i need to print 1 or 2 of the sidehearV3? when i open the file it looks like there’s 2 but appears to joined?
thanks for any help figuring this out
Hello,
Just print one it once and separate the two pieces by cutting off the small joints.
Hi, am I the only one facing issues with the printing of EyeglassV4.stl? I was printing it many time but I’ve each time 2 small holes printed under each eye. When I check the preview of printing I indeed see it created in the slicing. When I open the file with meshmixer I don’t see but when I try to make this part a bit thicker I’ve these holes also appearing…
Hello,
You maybe need to have a higher resolution.
Chances are that you resolution setting is not able with your slicer to consider this thin part as printable, that would be the reason it leaves a hole.
I normally print those parts at 0.3mm with no issue.
Even at 0.1 mm Layer Height Precision it was making me 2 holes there. But after reviewing all settings available in Cura, I found a “Print Thin Walls” check box by default unchecked allowing the print of thinner parts than nozzle (0.4 for me). And after checking this it seems in the preview that it’s fulfilling this part too. But I think it’d be stronger by making this under eye part a bit thicker. I was able to find the V3 of this part on the Net but it wasn’t the same fixation for inside.
Send me an image of the part in cura showing where you get the holes, I will see if there is space enough to add a bit of thickness. When I designed the inside of EyeGlass, it was 8 years ago and my skills in Blender were only starting. Since then I have re-designed the outside to smooth up the surface but didn’t check the inside.
I found, playing with all parameters and simulating the printing I found it was solved by returning parameter “Horizontal Expansion” to 0. To have correct sizes of printings, I found I had to define this parameter at -0.2mm for my printer CR10S, after a lot of incorrect printings… It’s not yet clear why exactly, but just changing back to 0 this parameter is slicing without any holes in the print anymore. I’ll make a test. As result, the distance between holes in inside nose fixation won’t be correct anymore. But if I’m correct, these holes a no more needed as the fix part has to be glued afterwards on it. I’ll make a test this way
hello sir ,
it would be better if you make a separate list for the parts which should be printed with support and without support for especially head and also recommended for other parts.
thank you!!!
Hello,
I have done that for some parts like the “Back”, but I just never got the time to do it for the rest.
I would need more free time to update the site..
Hello Geal I am doing the head of the inmoov project, but I have a problem, how can I change the robot’s speech sentences and language from which file, I could not find any information on the site.
Hello,
You can follow this tutorial to find out how to create a voice command to control a gesture:
http://inmoov.fr/how-to-create-gestures-for-inmoov/
After reading this tutorial, you should understand where to locate the files for to change the speech sentences. Note that AIML files are complex and contain a LOT of data.
To change the language you can follow this tutorial in the section “How to change language”:
http://inmoov.fr/how-to-start-myrobotlab/
hello
Hello, does anyone know where to connect the voice?
Hello,
Not sure what you you mean with your question. If you mean the loudspeaker for the voice, it is connected to your PC audio mini jack.
Hello @admin, yes that was my question thanks for answering me.
Bonjour, Merci pour toutes ses informations et surtout pour le partage de tous le rebot INMoov. Serait-il possible d’avoir les circuits imprimer ou le schéma électrique et la liste des composant électronique pour fabriquer les circuits imprimer de la carte Nervo. Conseil nerveux. Anneau Neopixel si s’est possible sinon je vous les achèterais.
Bonjour,
Les nervoboards sont la seule ressource financière du projet InMoov. C’est la raison pour laquelle les schéma de la nervoBoard ne sont pas openSource.
Bien cordialement
Bonjour, je m’excuse je ne me suis pas présenté je m’appelle Stéphan je suis passionner d’électronique robotique informatique et de programmation j’habite dans le 81 j’ai déjà imprimer le visage du robot avec ma Artillery Sidewinder x1.
Bonjour et bienvenu!
Bonjour, merci de votre réponse faut-il commander les deux plaques surcuit imprimer + les composant ?
Bonjour,
Cela dépends de l’ampleur de votre projet, mais si vous avez l’intention de construire tout le robot, il vous faudra deux Nervoboards ainsi que les composants.
Bonjour, merci pour votre réponse. je veux construire tout le robot. Peut-on payer en 4 fois avec PayPal j’ai l’option et le compte mais acceptez-vous le payement en 4 fois ?
Bonjour, les commandes passent par un CEVAD, un centre d’envoi, je ne gère pas cette partie. Et je ne pense pas que cela soit possible.
PS: J’étais un grand fan de GéoTrouvetou quand j’étais gamin.
Bonjour, merci pour la réponse je vais voir pour acheter les cartes, je trouve que pour un bricoleur GéoTrouvetou est une bonne image. Moi aussi J’étais un grand fan de GéoTrouvetou quand j’étais gamin.
A titre d’info pour ce que sa intéresse et pour que vous soyez au courant si on a un compte PayPal et le payement an 4 fois sa marche ses PayPal qui paye et on règle tous les mois la somme diviser en 4. Pendant 4 mois.
A titre d’info pour ce que sa intéresse et pour que vous soyez au courant si on a un compte PayPal et le payement an 4 fois sa marche ses PayPal qui paye et on règle tous les mois la somme diviser en 4. Pendant 4 mois. sa a beguer
Bonjour merci pour tout j’ai reçu ma commande rapidement et bien emballer il me reste qu’à souder les composants et commander les autre carte Arduino j’ai le temp j’imprime les pièces de la tête.
Hello Gael, my name is Cristian, I am from Argentina and I am new to the forum, I am starting this beautiful project which has me very entertained, I wanted to ask you if this Digital Servo Td8320mg Torque 25kg Metallic, could be used for the shoulder and the arm sorry my bad english
Hello and welcome,
The size of the TD8320MG would require to redraw the parts because it is too small.
HS805BB Size:
• Couple (Kg-cm): 24.7
• Dimensions (mm): 66x30x58
TD8320MG Size:
• Couple (Kg-cm): 20.5
• Dimensions (mm): 40.6×20.4×39
Thanks for replying so soon, ok
I understand perfectly. Thank you.
Hello Gael, I don’t know if this is where I would have to ask this, but I wanted to know where I can download the inmoov software because I am seeing that there are several software but I don’t know which one would be functional, I downloaded one that is an executable everything was fine but when opening the localhost it doesn’t show anything, reload the page several times and it’s still the same. Thanks
selam ilk önce tebrik ederim ben birşey sormak istiyorum
android bir telefonu nasıl sisteme dahil edebiliriz bir yorumunuz varmı acaba
I’ve bought me this set from amazon to start with:
2 Boxes Screws With Round Head Kit Set Micro Phillips Screw Micro Repair Screws Small Repair Screw Repair Screw Kit Set 18 Sizes With Screwdriver For Glasses Watch
Let me know how this goes, it could be a proposition for other users looking for a bundle.
Hey ive just strated this project and nearly have the head built. The speaker in the mouth is this the same as the 2 that are in the hardware list and replaces the need for the 2 in the ears and just run with the one in the mouth?
Thank you!
Max
Bonjour Gaël, je me présente, je m’appelle Jérémy, je suis angevin (ce n’est pas mon nom de famille à moi :D) et j’ai commencé la construction du robot InMoov par la tête il y a une semaine. J’arrive à l’étape de l’assemblage de toutes les parties (il ne me manque que le gros moteur pour la rotation de la tête). Le problème c’est que je bloque sur une partie : Dans un premier temps, le mécanisme des yeux avait un problème, pour moi les yeux étaient trop près du “masque” et les globes oculaires frottaient contre la paroi, j’ai donc dû espacer légèrement avec de la colle chaude la partie qui est fixée sur le nez (Problème résolu). Seulement voilà, le moteur qui fait bouger les yeux de haut en bas ne peut plus bouger librement car il vient toucher la pièce qui s’appelle : “SkullServoFixV1″… Premier problème. Dernier problème que je viens juste de m’apercevoir, je viens de finir d’imprimer les “JawSupportV1” et pareil, ils ne peuvent pas monter vers le haut car ils viennent toucher les supports des caméras des yeux (le mécanisme des yeux)… J’ai regardé toutes les animations de montage, plusieurs vidéos sur internet, le montage semble correct, je ne vois pas d’où peut venir le problème. Suis-je le seul à rencontrer ce problème ? Merci d’avance pour votre aide
J’espère pouvoir terminer la tête avant la fin de l’été pour la présenter à mes collègues et aux élèves de la première Newton Room de France et de la futur FabLab à la rentrée 2023.
Merci beaucoup
Jérémy
Bonjour,
Il est possible que vous ayez inversé (bas en haut) la pièce qui relie le mécanisme des yeux au masque du visage ce qui aurait pour effet de générer tout ces problèmes. Il y a déjà eu quelqu’un qui avait fait cette erreur.
Hello wonderful People,
I have started my journey in InMoov, and I am so excited, I finally was able to get my own 3d printers, I know I am a little late, but Mr. Langevin has been an inspiration. Any advice is greatly appreciated or things to lookout for please let me know.
Hello and welcome on board!
You can join us on our discord channel for more discussions.
https://discord.gg/BkvFhktM5s
Hello,
How many of these do I need to print? Download SideHearV5.stl – I would think two, but I want to ask.
Hello, You need to print it only once, and separate the parts as explained in the tutorial.
Hello,
I am having a hard time finding a camera that fit the eyes, I have got couple FPV cameras but they are not fitting the eyes.
do you mind sharing couple options from amazon and i will order them?
Thanks
Hello, there is two types of camera that can fit, you will need to select the proper STL files in the gallery to mke sure you can mount it. Look for the lifecam hd-3000. Also look in the eye tutorial to see how to dismantle the camera casing to extract the driver board, mic and camera. ( keep the microphone on the board, it’s always handy to have that options)
bonjour
je suis nouveau dans le projet et avant de commencer ma première question je souhaite une très belle et heureuse année à tous
je suis en phase de finir l’impression de la tête et dans les commentaires je me rends compte que pour la compatibilité des servos moteur il faut que pas mal de critères correspondent, comment faire car quand je tape les servos moteurs origine je ne trouve plus tellement d’info , ou je me débrouille peut être mal. j’ais bien sur plein de questions qui viendront par la suite car en dehors de l’impression 3d je suis novice je ne m’y connais pas du tout en électronique et en Arduino pour mes imprimante je suis passer directement par marlin via VSCODE
dans l’attente merci d’avance du retour
Hello,
should some parts from the skull and ears stl list be printed x2? Like the speaker 1 or the speaker spacer 1?
Thank you
hola Gael soy nueva en el grupo … mi pregunta es la siguiente los archivos stl son para formar un solo robot o son diferentes tipos de robot no comprendo muy bien :/ estoy un poco confundida aunque ya empeze a imprimir el antebrazo.
gracias
hola Gael soy nueva en el grupo… mi pregunta es la siguiente los archivos stl son para formar un solo robot o son diferentes tipos de robot no comprendo muy bien :/ estoy un poco confundida aunque ya empeze a imprimir el antebrazo.
gracias
Just completed the head. Share it in the youtube link here
https://www.youtube.com/watch?v=N3q8vQ77PFw
I am making the I2 head with silicone face and just curious where does the little speaker box go now for that version.