If you are on this page it’s because you are ready to try out new things!
We have been working hard to get InMoov2 within Nixie pretty close to release, but we need your help before the final step. If you notice weird behaviors, please report to myrobotlab.org or send a « NoWorky » to the developers via the button.
 Myrobotlab can be installed on Windows, Mac and Linux.
SETUP & PREREQUISITES:
Nixie 1.1.xxx
1/ Install:
Java JDK 11 (64-bit) version – https://www.oracle.com/java/technologies/javase-jdk11-downloads.html
( note that some Nixie functionalities will probably not work with 32 bit Windows system)
CHROME – https://www.google.fr/chrome/browser/desktop/index.html ( set it to default )
ARDUINO.exe – https://www.arduino.cc/en/Main/Software
2/ Set the Port com of your Arduino(s) in device manager to 115200 BAUD.
3/ Create a new directory [mrl] on root of your disk like this C:\mrl\
4/ Download Myrobotlab : myrobotlab.zip and extract it like this in your C:\mrl\
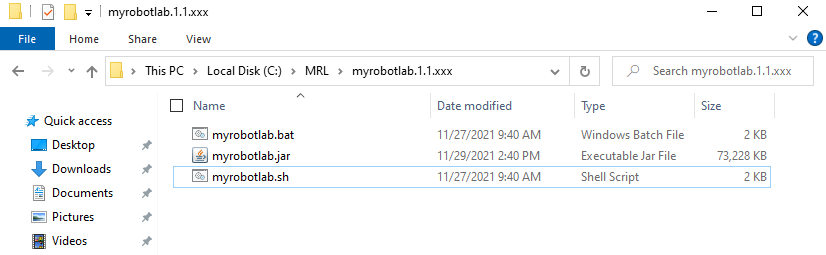
5/Double click myrobotlab.bat and wait for MRL to install and launch your Chrome browser. For Mac and Linux users, Open your terminal, set the path to your directory which contains the myrobotlab.sh file and run this line: ./myrobotlab.sh (more info)
This is going to take a while, you can see the status of the installation in the command prompt.
6/When Chrome browser is finally launched, click the Intro tab, then click the InMoov logo.
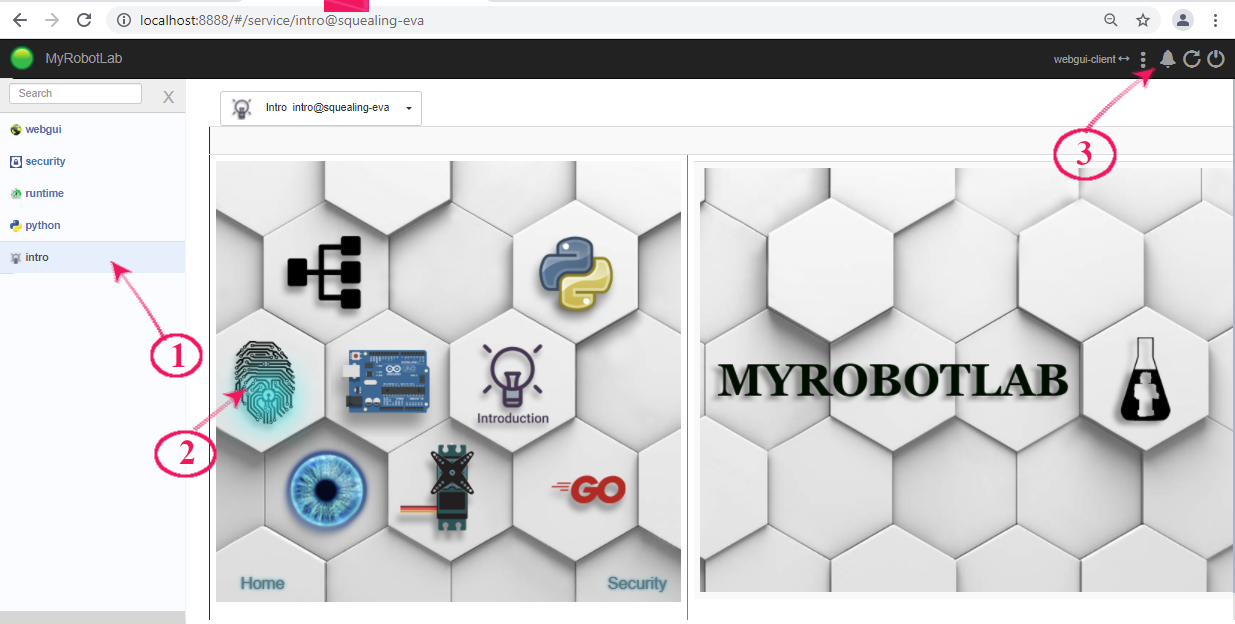
7/InMoov2 will load components, then the InMoov2 window should open. The notification while show all loaded components. You can select each skeleton to configure them or launch the preset script to test the Virtual InMoov potential at once.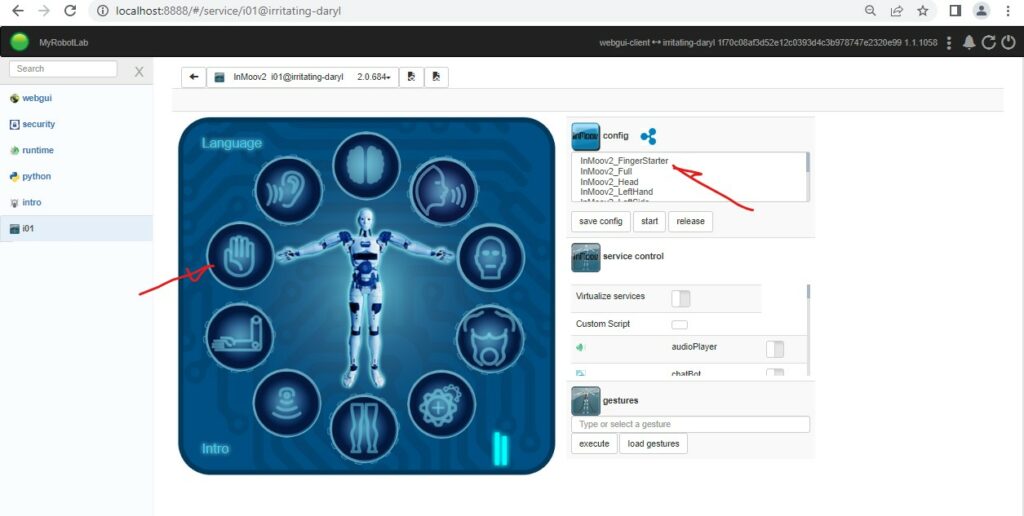 8/For to run in non virtual mode, you need first to set your controller. In order to have Myrobotlab communicating with your Arduino, you need to install a code (MRLComm.ino) on it using the Arduino.exe.
Here is where that code is located.
9/Once the MRLComm.ino code has been uploaded to your Arduino, you can go back in the Myrobotlab software. Click on the controller icon, then click on settings.
Turn ON the controller service, and click settings.
It should open the controller service tab. If you haven’t uploaded the MrlComm.ino into your Arduino board, you can get it as a zip file (more info via Intro tab/Arduino). Select your Arduino board type. Set the COM port and click « Connect ».
10/Click to start the skeleton.
Turn ON the skeleton and click settings to access the configuration window.
Select the servo Finger, select your controller, attach the servo to the controller, and select « Basic » to access the mapping panel.
The mappings are default preset, but you should adapt the range of movement of your servo to avoid mechanical constraints or damage. Moving the « Output » sliders will do that. Test the range with the main slider. When you are satisfied with your mappings, click « Save config ».
11/Repeat these operations for every skeleton parts of your robot.
12/Testing finger sensors.
13/You want to switch of general language? Currently the « Language » button is still a work in progress but you can bypass via the Runtime tab.
14/You want your robot to have a brain? Easy just follow these steps.

You can add LLM language (chatGpt) to the brain of your robot, to make it fully conversational. You can install and use Ollama or you will need to get a key token if you are using OpenAI.
 15/You want your robot to speak?

16/Now your robot needs to listen to you? This also shows two ways of saving your service « Ear » in your default config:

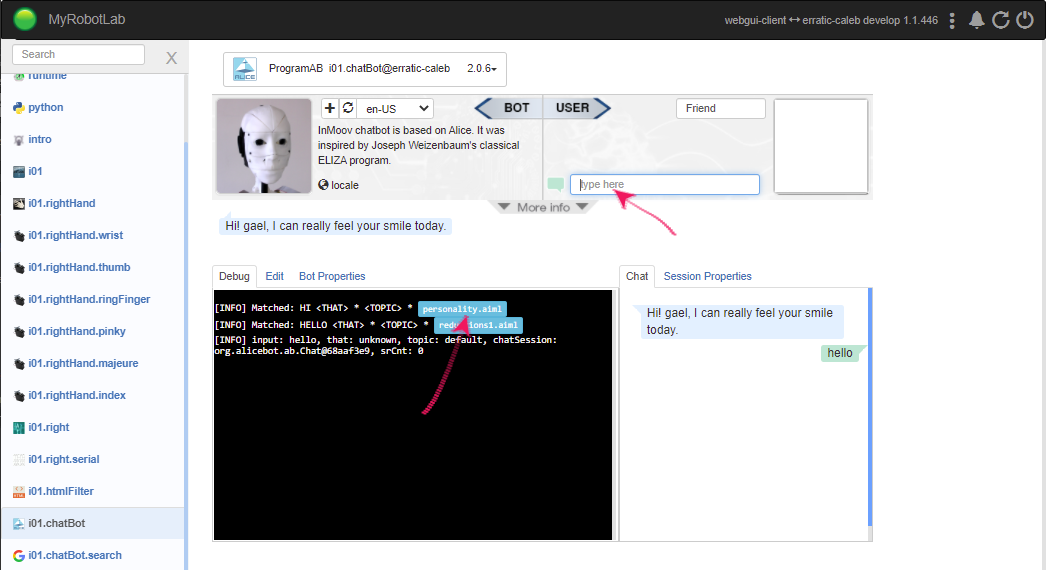
17/You can talk or type to your robot. You can also edit the AIML files to make modifications to its « Brain ».
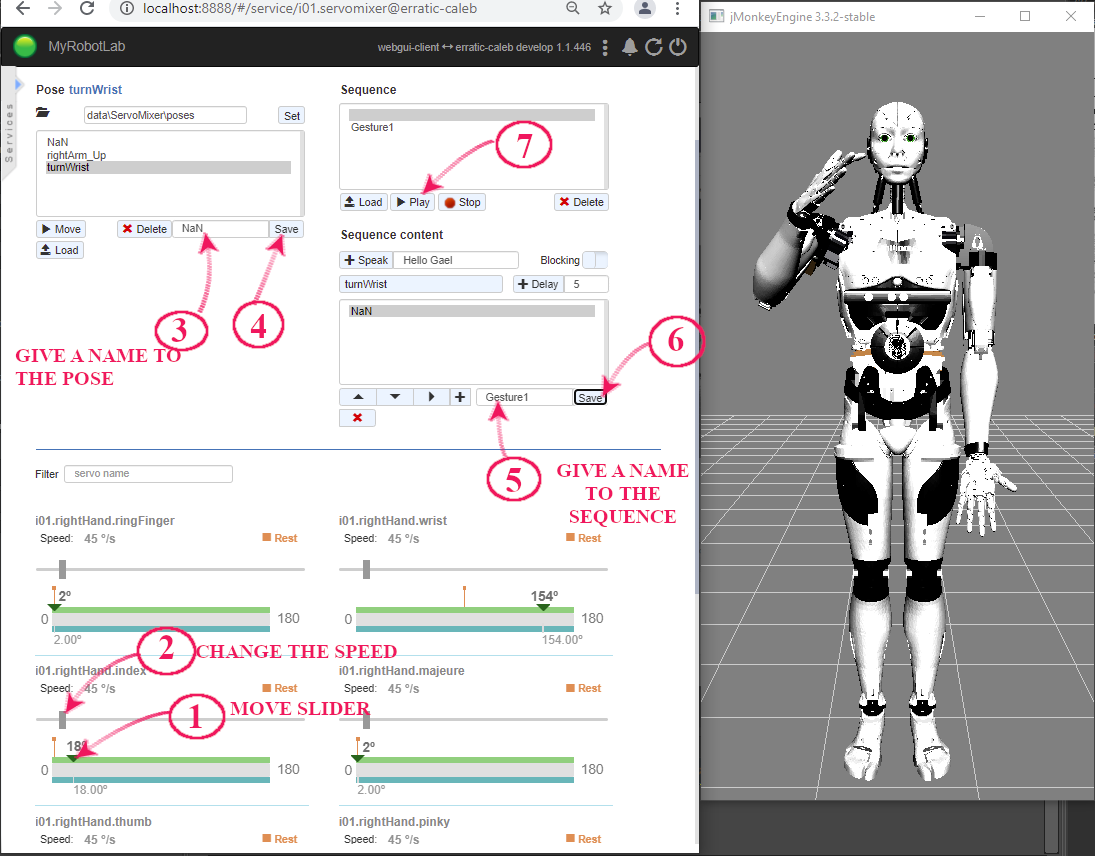
18/You want to create a gesture for your robot and preview before running it on your real robot?
19/In ServoMixer tab:
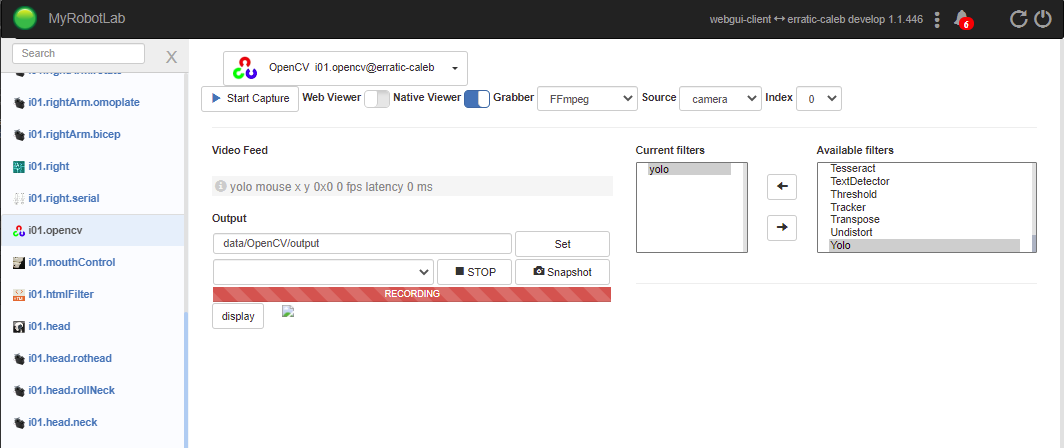
20/Want to set vision for your robot? Connect the camera to the PC.
21/Select your camera index and set the default grabber. Press « Start Capture ». You can add some filters to enhance the use of the vision. For example yolo filter detects and recognize objects.
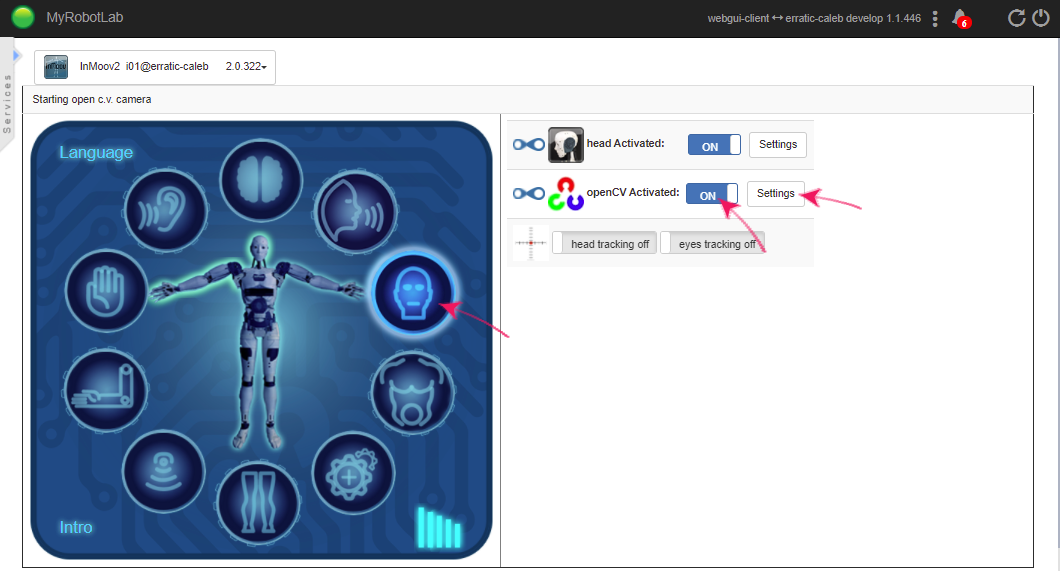
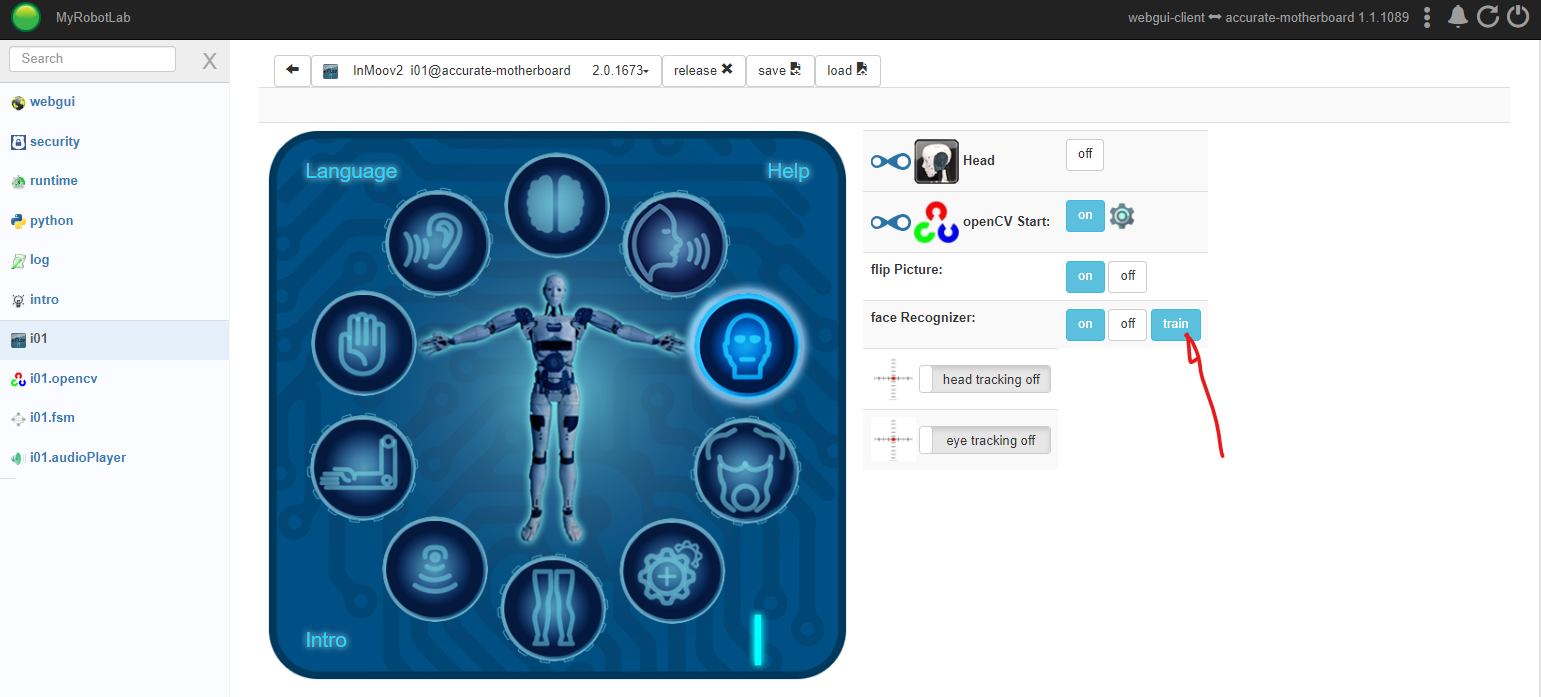
22/You can use the face recognition directly in InMoov UI. After starting opencv button, it will display new buttons. By default face recognizer is ON. When you press the TRAIN button, the bot will ask your name and will start the facerecognizer filter, make sure to be facing the camera during the process. If all is good, your face pictures should be loaded in the directory myroblotlab/training/yourname/ . Now if you tell your bot to « go to sleep » and then « wake up », it should greet you after recognizing you. Important, you need to train at least two different faces before it can work properly. Also if you have a PIR setup, the bot will wake up when detecting presence and will automatically try to recognize a face.
23/Need to add a Neopixel to your robot?
24/You want to ask the weather to your robot and add your security key.
25/You want to connect a leapMotion to actuate the hand
26/You want to create your own scripts? When starting InMoov, it automatically loads a CustomScript, which you can modify and use to execute other scripts. This script is located in myrobotlab-1.1.XXXX/data/InMoov2
27/Below is how to add a PCA9685 to i01.left controller and to connect a servo of the i2Head