To use a neopixel you need a dedicated arduino. A small one , Arduino Nano or promini is enough.
You have 2 options to connect this 3rd arduino , Using RX/TX ( master – slave Arduino ) or direct USB.
Tutorial written by Anthony.
__________________________________________________________________________
Setup:
- Option 1 – easy – Using usb cable
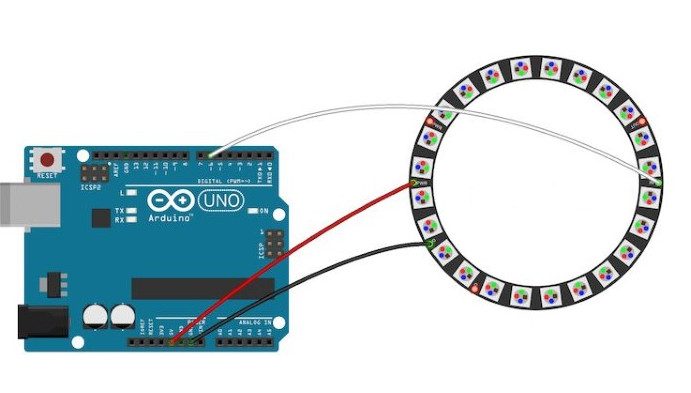
1: Plug Neopixel wires like this ( you can use optional 1000 µF, 6.3V capacitor ) :

2: Upload MRLcomm Inside the dedicated arduino
3: Activate Neopixel inside InMoov/config/service_9_neoPixel.config like this
( change of course NeopixelMasterPort=COM5 and pin=2 to Your values )
[MAIN]
isNeopixelActivated=1
NeopixelMasterPort=COM5
[NEOPIXEL]
pin=2
numberOfPixel=16
______________________________________________________________________________
- Option 2 : Using RX/TX connection
It is usefull if you don’t have enough usb port
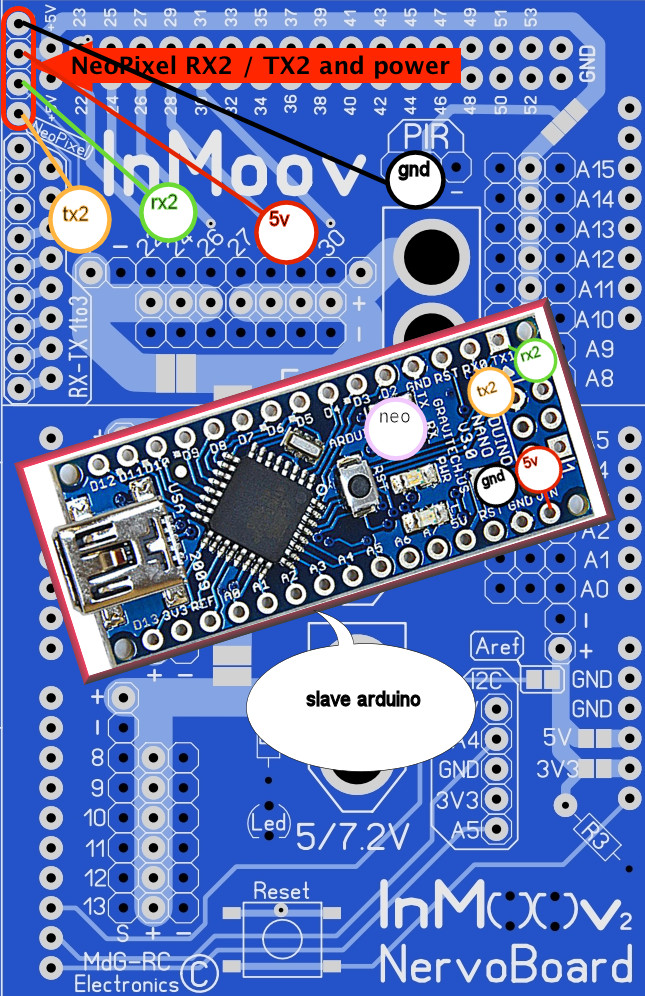
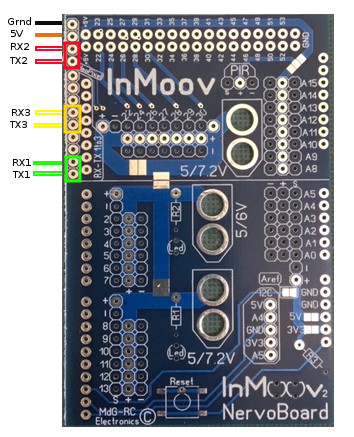
1: You need to connect Arduino slave to Arduino master like this
new Nervo Board:


Older NervoBoard :

Neopixel:

2: Upload MRLcomm Inside the dedicated arduino
3: Activate Neopixel inside InMoov/config/service_9_neoPixel.config like this
( change of course NeopixelMaster=left/right and pin=2 to Your values ) For information Serial2 ( RX2/TX2 ) is case sensitive
[MAIN]
isNeopixelActivated=1
NeopixelMasterPort=Serial2
NeopixelMaster=left
[NEOPIXEL]
pin=2
numberOfPixel=16
You can also test your NeoPixel by running this python script directly in MyRoboTlAB:
https://github.com/MyRobotLab/pyrobotlab/blob/develop/home/hairygael/NeoPixelTest.py
source: http://myrobotlab.org/service/NeoPixel
source: https://github.com/MyRobotLab/inmoov/wiki/HOWTO-Neopixel-diagram-&-configuration